TUTORIAL Google ADK: Building AI Agents for Instagram Marketing
Published on
Alright everyone, today we’re diving headfirst into a topic that’s on fire in the AI world: AI Agents! More specifically, we’re going to use the Google Agent Development Kit (ADK) to build a system with multiple agents working together to create draft posts for Instagram.
For those who don’t know it, the Google ADK is a toolkit that makes life a LOT easier for anyone who wants to build agent-based applications with the Gemini family of models. The idea is that we can create agents that can “reason”, use tools (like Google Search) and interact in more complex ways.
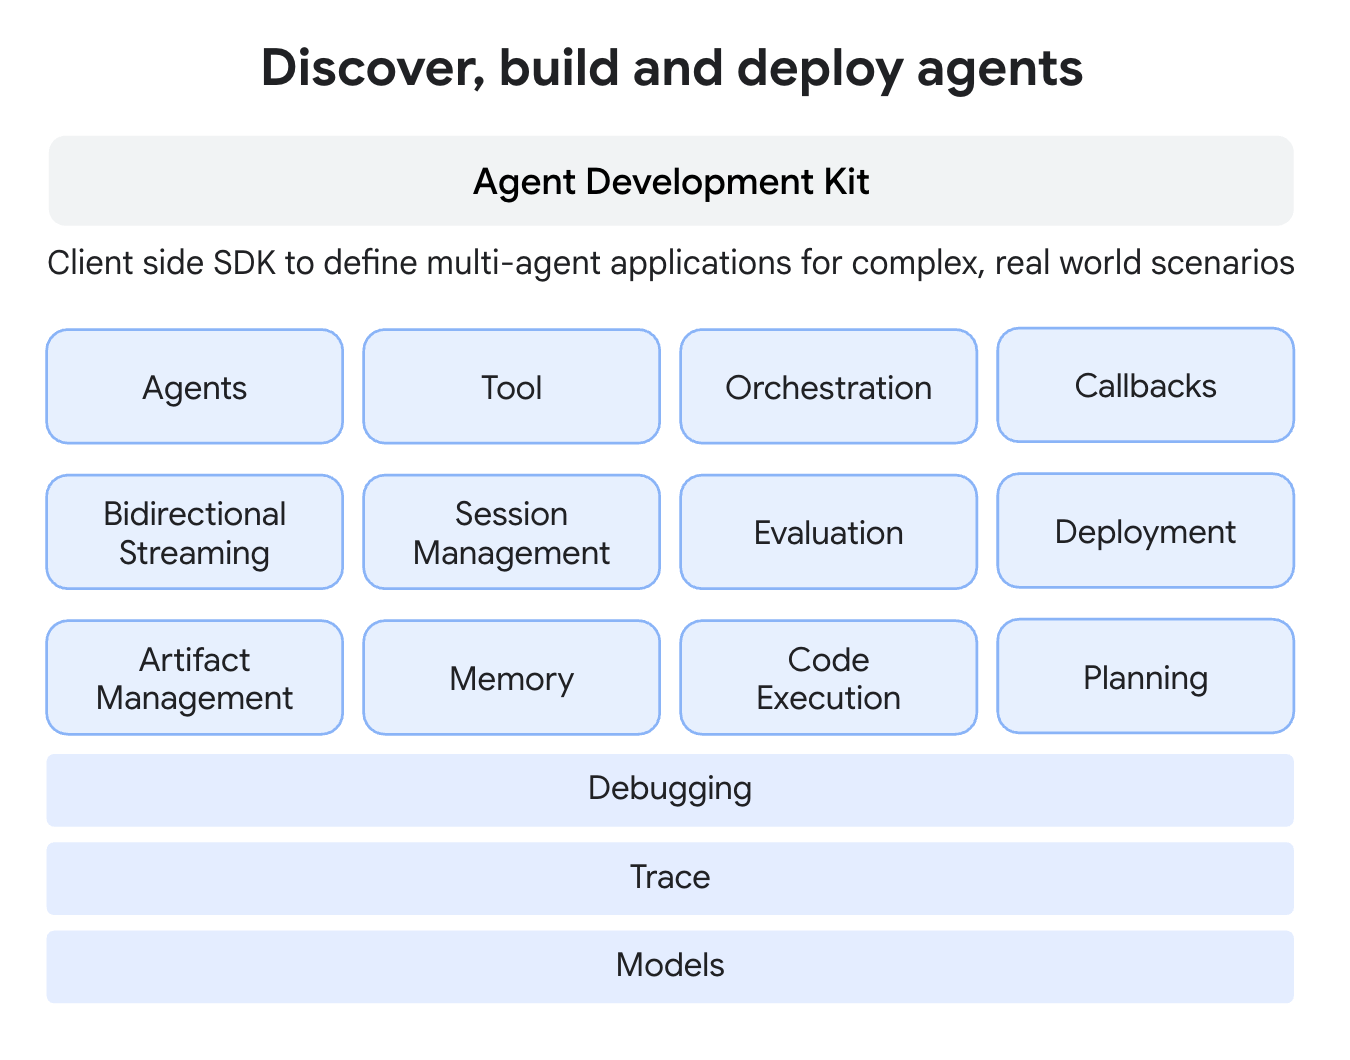
If you want to follow this tutorial with the complete code, you can head over to the GitHub repository (and give it a star!).
Shall we?
Setting Up the Environment
First of all, we’ll need to create a Gemini API Key, which we’ll use to connect to Google’s models. An API Key is like a secret password that an application uses to identify itself when it “talks” to another online service. It makes sure that only those with permission can access data or features, controlling usage and protecting privacy!
To get yours, just go to Google AI Studio: https://aistudio.google.com/app/?hl=pt-br
There, at the top, you’ll find a “Get API Key” button:
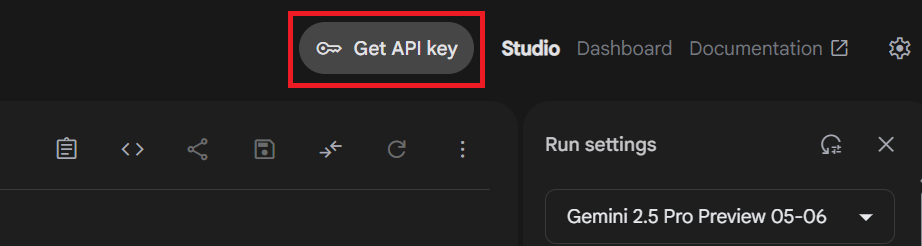
When you click it, you’ll be taken to another page. At the top right, you’ll see a “Create API key” button. When you click it, one of two things can happen:
- If this is the first API key you’re creating, it’ll generate (under the hood) a new project for you, and simply show you your API Key.
- If you’ve already created other API Keys or projects in the Google cloud, it’ll ask you to pick a project. You can pick any of them and ask it to generate the key.
It’ll look something like this: “RkmkkgdSD3isSdsdmDGDksfsdHHr”. You can copy and paste it into a notepad for now, because we’ll be using it very soon.
IMPORTANT: NEVER SHARE YOUR API KEYS WITH ANYONE! It’s like a username and password, so keep it well hidden.
Now that you have your API Key, I can tell you about the environment where we’ll code the project.
For this tutorial, we’ll run everything on Google Colab, so you don’t depend on any local installation or on how powerful your machine is.
If you already know Colab, you can skip this section. If not, I’ll explain a bit about this tool below.
Google Colaboratory, or Colab to its friends, is basically a Jupyter notebook environment that lets you run Python code in Google’s cloud, and the coolest part is that it’s totally free and you don’t need to install ANYTHING on your machine to start using it.
Click here: https://colab.new/
That will create a brand-new notebook for you, which will look like the one below:
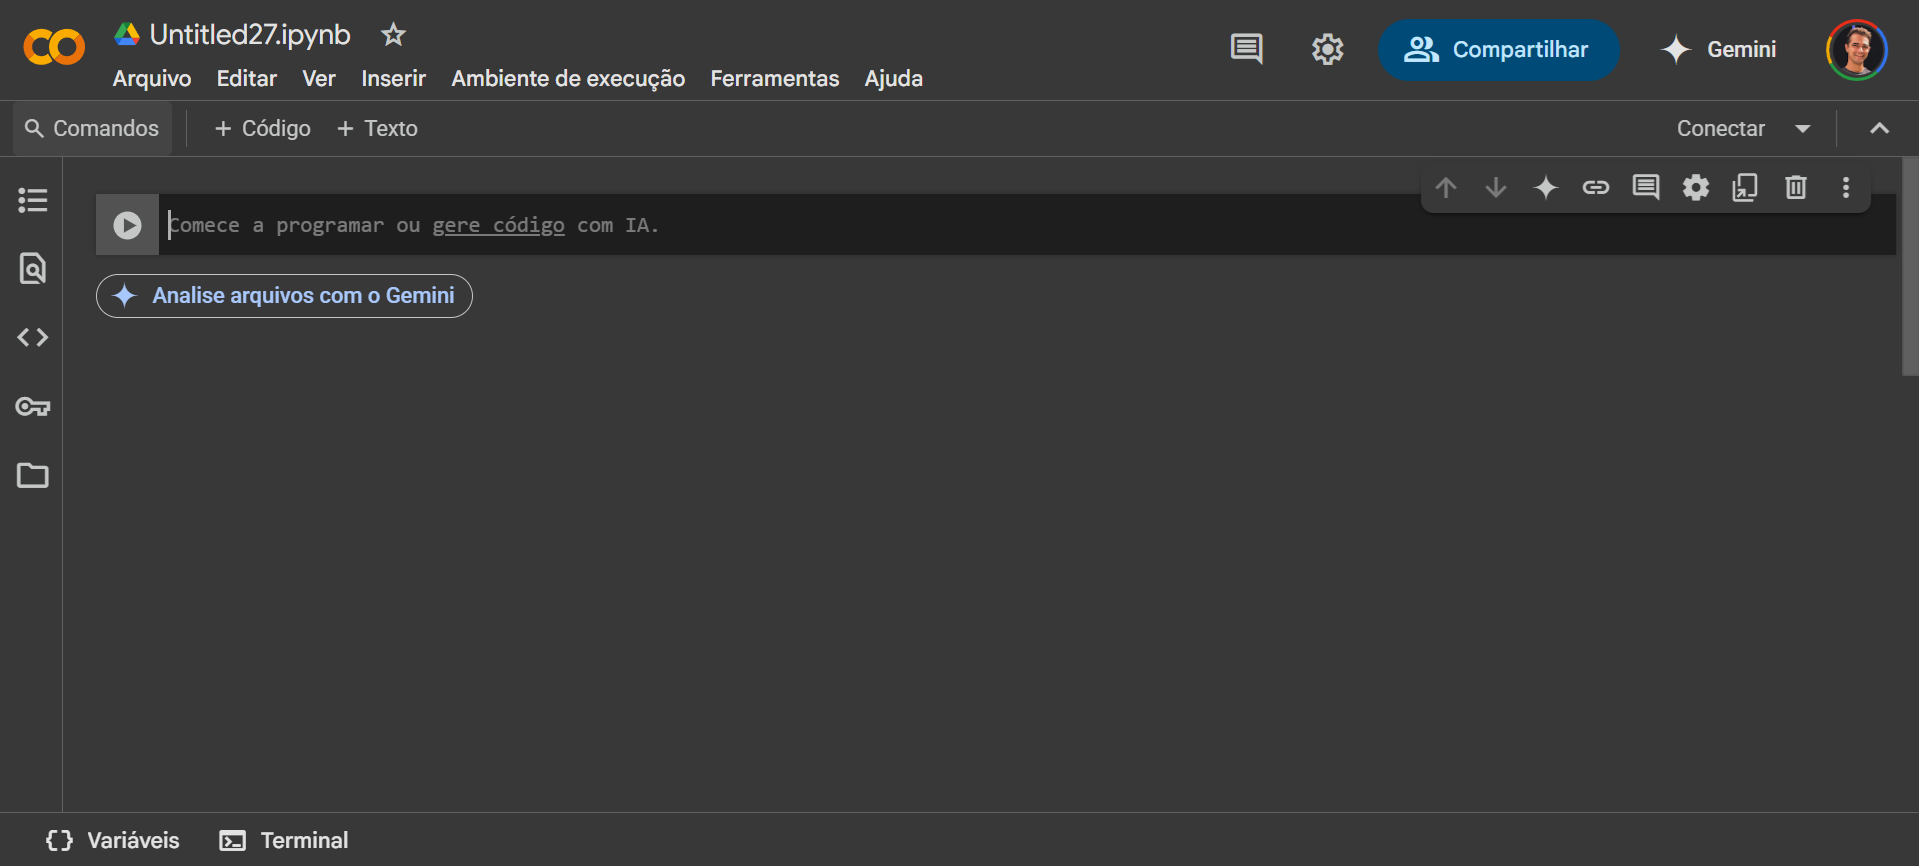
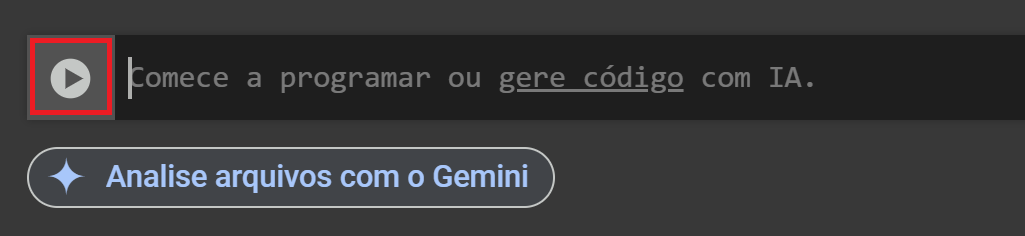
That darker little block is where you’ll start typing your Python code. To run each code block, just click the “Play” button on the left side of the block:
If you want to create a new code block, just hover your mouse over the bottom part of the current block, and it’ll give you the option to create another one:

With that, you’re ready to start developing your agents project.
Project Idea
Imagine you work with the social media of a company, or your own. You want to generate content using AI, but that content has to be up to date, in line with the latest news and/or launches in your area of interest.
That’s the idea of the project.
We’re going to build a multi-agent system using Google’s ADK framework, and it’ll give us access to all of that.
Our system will be made up of 3 agents:
- A Search Agent to find the latest news about a topic that we’ll send to it.
- A Planner Agent to dig up more information about that news, pick the most relevant item and create an action plan for building the post.
- A Writer Agent to write the final post.
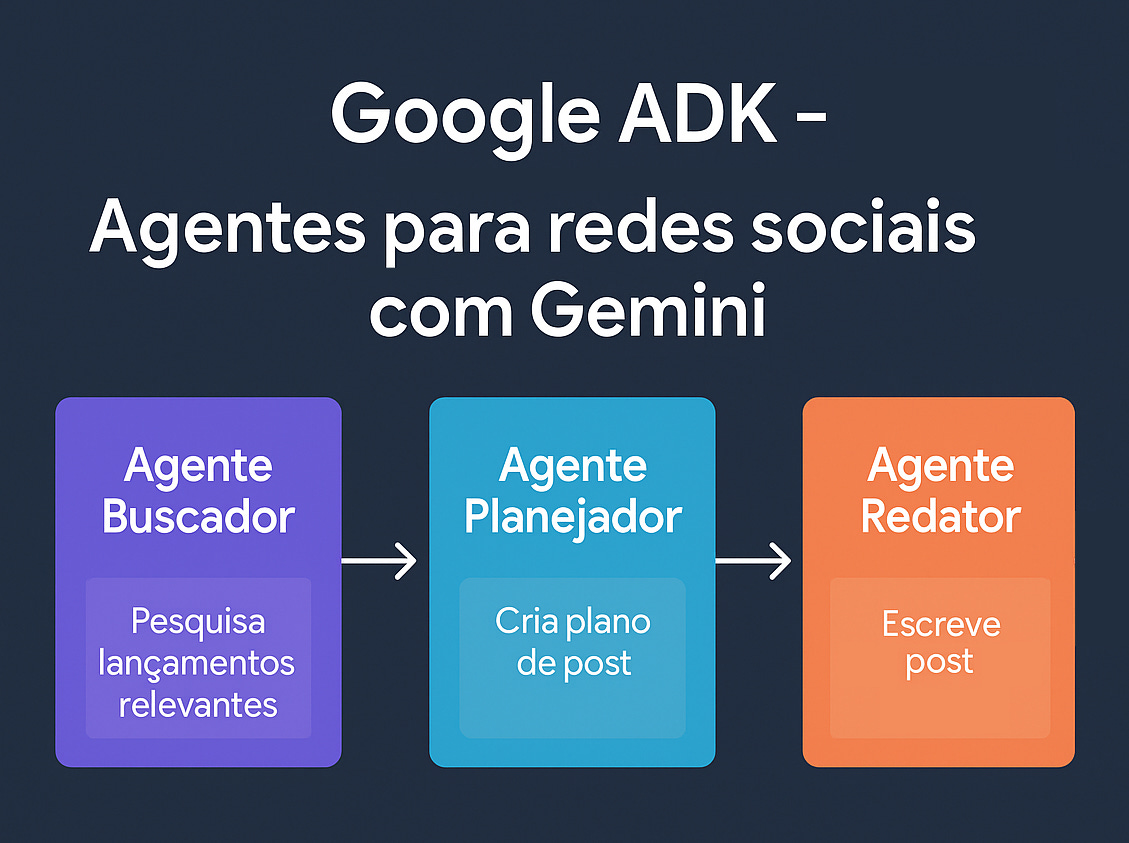
Diagram of the 3 agents
Ready to get our hands dirty?
Project Code
I’ll split the code into a few subsections to keep things organized, okay?
Installs and Imports
First of all, like in any self-respecting Python project, we need to install the necessary libraries. In this case, there are two main ones:
- google-genai: Google’s official SDK for interacting with the Gemini API.
- google-adk: Our beloved ADK, the Agent Development Kit!
And of course, to install things in our Colab notebook, we use the “!pip install” command:
!pip install -q google-genai google-adk
The “-q” in the command is just to make the installation “quieter”, without showing a ton of logs.
Now, you can create a new code block.
With the libraries installed, the next crucial step is to configure our Google Gemini API Key, the very same one we got in the “Setting Up the Environment” section! Without it, we can’t “talk” to the models.
In Google Colab, the safest and recommended way to do this is by using userdata. You’ll need to add your API Key to the “Secrets” of your Colab notebook. To do that, just click the key icon (🔑) in Colab’s left sidebar:
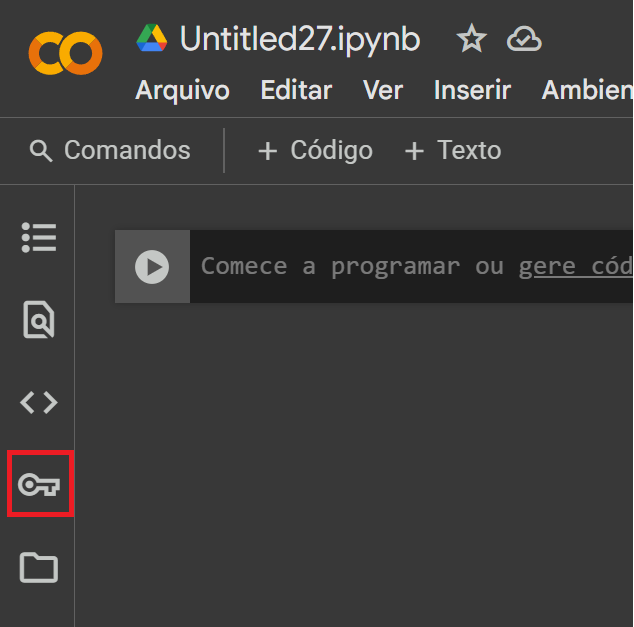
In there, you’ll click “+ Add new secret”, and that’ll open two fields. In the left field you’ll type the text “GOOGLE_API_KEY”, and in the right field you’ll paste your API Key. You can also click the switch on the left side to enable this key.

After that, the code below will safely load that key into our notebook’s environment.
# Configures the Google Gemini API Key

import os
from google.colab import userdata

os.environ["GOOGLE_API_KEY"] = userdata.get('GOOGLE_API_KEY')
API Key configured? Great! Now, to start playing with Google’s models, we’ll need to initialize a “client” from the SDK.
Imagine that this client is you, walking into a little corner shop called “Google”. You, the customer, want to buy products. The shop owner needs to know where to send those products. That’s more or less the idea.
# Configures the Gemini SDK client

from google import genai

client = genai.Client()
It’s through this client object that you’ll be able to list models, send prompts and, of course, bring your agents to life.
Everything’s ready with the basic Gemini setup. Now, you’ll import the specific Google ADK components, which will be the backbone of your agent system. They are:
- Agent: the fundamental class for creating agents. This is where you’ll define the agent’s name, the language model it’ll use, the instructions (the “system prompt”), the description and the tools it can access.
- Runner: as the name suggests, it’s the one responsible for “running” an agent. It manages the lifecycle of the interaction with the agent.
- InMemorySessionService: to keep the context of a conversation with an agent (or between agents), we need a session service. InMemorySessionService is a simple implementation that stores the session information in memory. Perfect to get started and for this tutorial!
- google_search: A prebuilt ADK tool that lets our agents… guess what? Use Google Search! This gives the agents the ability to look up up-to-date information on the web.
- types (from google.genai): We’ll use this to structure the messages we send to and receive from the agents, specifically the Content and Part objects.
The code to import these guys is:
from google.adk.agents import Agent
from google.adk.runners import Runner
from google.adk.sessions import InMemorySessionService
from google.adk.tools import google_search
from google.genai import types
With them imported, we can already start playing around.
Starting the session and helper function
First of all, you’ll need a session service. As I mentioned above, for this tutorial, the InMemorySessionService we imported is more than enough. It’ll take care of storing the conversation data while our code is running. In more complex production scenarios, you could use other implementations that persist the data in databases, for example.
The code is pretty simple:
# Creates an in-memory session service

session_service = InMemorySessionService()
Now comes the most annoying part of the whole code, but I’m here to hold your hand, so DON’T PANIC!
Basically, we need to create a helper function that will greatly simplify how we interact with the agents. It’ll be an asynchronous function, and it’ll do a few things:
- Receives an Agent object (which will be one of the agents we’ll create), and that specific agent’s prompt.
- Creates a new session using the session_service we created above.
- Creates a Runner that will run the specific agent we want to call.
- Formats the prompt we send along with the agent into the format ADK expects (a Content object containing Parts, now it makes sense why we imported that “types”!).
- Runs the agent asynchronously (runner.run_async). This is important because interactions with LLMs can take a little while, and async lets other things happen while we wait for the response.
- When we get the runner’s result, it iterates over the returned events. ADK works with an event system, and we’re interested in the event that signals is_final_response(), that is, this agent’s final response.
- When the final response arrives, we extract its text (the AI model’s answer) and return it.
Let me put the code here so you can see how this ended up structured:
# Helper function that sends a message to an agent via Runner and returns the final response

async def call_agent(agent: Agent, message_text: str) -> str:

    # Creates a new session (you can customize the IDs as needed)
    session = await session_service.create_session(app_name=agent.name, user_id="user1")

    # Creates a Runner for the agent
    runner = Runner(agent=agent, app_name=agent.name, session_service=session_service)

    # Creates the content of the input message
    content = types.Content(role="user", parts=[types.Part(text=message_text)])

    final_response = ""
    # Asynchronously iterates over the events returned while the agent runs
    async for event in runner.run_async(user_id="user1", session_id=session.id, new_message=content):
        if event.is_final_response():
          for part in event.content.parts:
            if part.text is not None:
              final_response += part.text
              final_response += "\n"
    return final_response
Now, reread the explanation points about this function. Now it makes more sense, right?
Note that we can (and should, in more complex scenarios) pass a user_id and even a specific session_id. To keep things simple, here we use a fixed user_id and let the session_id be generated automatically by the service.
If you didn’t understand why we use async and await in the code, I recommend reading this article from Alura (in Portuguese) and/or asking Gemini for help.
Fetching the Gemini models available for the agents
Moving on, before we create the agents, it can be useful to take a peek at the Gemini models we have available through our API Key. This helps us know what options we have when choosing the “brain” of each agent (since the list changes often).
The code below uses the client we set up at the beginning to list all the accessible models:
# Lists all models currently available

for model in client.models.list():
    print(model.name)
The result will be a list of models like “models/gemini-2.0-flash”, “gemini-2.5-pro-preview-03-25”, among others.
For our project, I’ll use a faster model for the tasks that require internet searches and a more robust model for writing the text. You can use the more robust one or the faster one for all the agents (we’ll see how soon), it’s up to you, and it’s well worth testing which ones work best in which situation for your use cases.
For this project, we can set in the next code block that our models will be:
MODELO_RAPIDO = "gemini-2.0-flash"
MODELO_ROBUSTO = "gemini-2.5-pro-preview-03-25"
Note: since “gemini-2.5-pro-preview-03-25” is a preview model, there’s a big chance it won’t be available anymore by the time you’re doing this tutorial. In that case, pick one of the other robust models listed in the previous code block (I recommend models that have the word “pro” in the name).
Agents
You’re finally going to create your first agent!
Doing this is a lot easier than you might think. It’s basically an asynchronous function that will contain an Agent object (which we imported at the top). Each Agent object will have the attributes:
- name: the agent’s name
- model: the AI model associated with it
- instruction: its system instructions, that is, what it is and what it does
- description: description (which can be searched by other agents)
- (optional) tools: list of external tools it will have access to
Agent 1: News Searcher 📰
This agent will have a very clear mission: given a topic and today’s date, it should use Google’s search tool (google_search, which we imported earlier) to find the most recent and relevant launches about that topic. Here’s the code (the prompts in these examples are translated into English; the repository has them in Portuguese, and the agents work the same way in either language):
##########################################
# --- Agent 1: News Searcher --- #
##########################################

async def agente_buscador(topico, data_de_hoje):

    buscador = Agent(
        name="agente_buscador",
        model=MODELO_RAPIDO,
        instruction="""
        You are a research assistant. Your task is to use the Google search tool (google_search)
        to retrieve the latest news about highly relevant launches on the topic below.
        Focus on at most 5 relevant launches, based on the amount of news and the excitement around each one.
        If a topic has little news or few enthusiastic reactions, it may not be that relevant
        and can be replaced by another one that has more.
        These relevant launches must be current, from at most one month before today's date.
        """,
        description="Agent that searches for information on Google",
        tools=[google_search]
    )

    entrada_do_agente_buscador = f"Topic: {topico}\nToday\'s date: {data_de_hoje}"

    lancamentos = await call_agent(buscador, entrada_do_agente_buscador)
    return lancamentos
Pay close attention to the prompt inside the “instruction” attribute. It’s the brain of your agent, and the better the Prompt Engineering you do here, the better the results will be (this tip applies to all the agents).
Another thing worth mentioning is the use of the google_search tool. If we hadn’t passed this parameter, the AI model in question would only have access to its internal knowledge. Since these models are trained months before they’re released, their knowledge is limited to that training date, which would be kind of useless for our project, since we want the most recent news. The google_search tool gives us access to Google Search, and with that we can look up news from any date on the internet, including the most recent.
After creating the “buscador” agent, notice that I created a string with the topic and today’s date called “entrada_do_agente_buscador”, which are basically the arguments we receive in this function. That’s the data that will be given to this agent, that is, our prompt, which the agent will use to look for the answer.
Next, we just make the asynchronous call (with await) to the call_agent function (that helper function we created earlier), passing the agent (the buscador variable) and the input prompt (the entrada_do_agente_buscador variable). The agent’s response is returned by that function.
(I think now might be a good time to go back to the call_agent function code and understand how it’ll receive this agent and this input prompt and what it’ll do with them)
Congratulations, you created your first AI agent! Woo hoo!
But before we celebrate, let’s keep going with the others.
Agent 2: Post Planner 📅
With the hottest launches in hand (thanks to the Search Agent), our next step is to plan the post’s content. That’s where the Planner Agent comes in.
Its responsibility will be:
- Receive the original topic and the list of launches that the Search Agent found.
- Use the google_search tool to dig deeper into each of those launches and identify the most relevant points that could be covered in a post.
- Based on that deeper research, choose the most relevant topic among the launches.
- Return that chosen topic, its most relevant points and a plan with the subjects to be covered in the post.
It’ll look more or less like this:
################################################
# --- Agent 2: Post Planner --- #
################################################

async def agente_planejador(topico, lancamentos_buscados):
    planejador = Agent(
        name="agente_planejador",
        model=MODELO_RAPIDO,
        instruction="""
        You are a content planner, an expert in social media.
        You receive a list of recent launches from the searcher agent and,
        - For each of the launches received, you must use the Google search tool
        (google_search) to find the most relevant points
        that we could cover in a post about each of them.
        You can also use (google_search) to find more
        information about each topic and go deeper.
        - After you finish searching, you will choose ONLY ONE topic among all of them,
        the one with the potential to be the most relevant based on your research.
        - After choosing the most relevant topic among all of them, you will return
        which topic was chosen, its most relevant points, and a plan with the subjects
        to be covered in the post that will be written afterwards.
        """,
        description="Agent that plans posts",
        tools=[google_search]
    )

    entrada_do_agente_planejador = f"Topic: {topico}\nLaunches found: {lancamentos_buscados}"

    plano_do_post = await call_agent(planejador, entrada_do_agente_planejador)
    return plano_do_post
Its input prompt is a little different. Instead of having the searched topic and today’s date, it’ll have the searched topic and the list of launches that were fetched by the Search Agent.
With that, we call the call_agent function again, the same way we did for the first agent, passing this planejador agent and its input prompt.
Agent 3: Post Writer 🖋️
Finally, we get to the agent that’ll roll up its sleeves and do the writing: the Writer Agent. Its mission is to take the topic and the detailed plan provided by the Planner Agent and turn them into a well-written Instagram post.
For this agent, as I mentioned, we’ll consider a slightly beefier model, like “gemini-2.5-pro-preview-03-25” (if available). Models from the “pro” series usually have better creative generation ability and follow more complex style instructions better.
######################################
# --- Agent 3: Post Writer --- #
######################################

async def agente_redator(topico, plano_de_post):
    redator = Agent(
        name="agente_redator",
        model=MODELO_ROBUSTO,
        instruction="""
            You are a Creative Writer specialized in creating viral posts for social media.
            You write posts for Alura, the largest online technology school in Brazil.
            Use the topic given in the post plan and the most relevant points provided and, based on that,
            write an Instagram post about the indicated topic.
            The post must be engaging and informative, use simple language, and include 2 to 4 hashtags at the end.
            """,
        description="Agent that writes engaging Instagram posts"
    )
    entrada_do_agente_redator = f"Topic: {topico}\nPost plan: {plano_de_post}"

    post_final = await call_agent(redator, entrada_do_agente_redator)
    return post_final
Note that this agent doesn’t need external tools, since its task is just to generate text based on the information already processed by the previous agents. So we can omit the tools attribute.
Other than that, the idea is the same, see? We call the call_agent function passing this writer agent we just created and its input prompt, which contains the topic and the post plan created by the Planner Agent in the previous step.
If you want the agent to follow your specific writing tone, you can use the Prompt Engineering technique called Few-shot, passing examples of your previous posts in the instruction attribute. If you don’t know what I’m talking about, take a look at this video I recorded a while back (in Portuguese).
With the Writer Agent ready, our trio of agents is complete! Each with its own specialty, working together toward a bigger goal. That’s the beauty of multi-agent systems!
Orchestrating the Agents
Before we orchestrate everything, let’s import a few utility libraries that will help us better format the text output in Colab and get the current date.
import textwrap # To better format the text output
from IPython.display import display, Markdown # To display formatted text in Colab

# Helper function to display Markdown-formatted text in Colab
def to_markdown(text):
  text = text.replace('•', '  *')
  return Markdown(textwrap.indent(text, '> ', predicate=lambda _: True))
This little to_markdown function will make it easier to convert and format the text the agents return, so it’s easier to read in Colab.
Next, we’ll use the datetime library to get today’s date in the DAY/MONTH/YEAR format:
from datetime import date

data_de_hoje = date.today().strftime("%d/%m/%Y")
And now the moment of truth has arrived! We’ll put all the pieces together and see our agent system in action.
The flow will be the following: first, we ask the user to type the topic they want to generate the post about. We check whether they typed anything. If they typed a topic, you’ll:
- Call the agente_buscador passing the topic and today’s date, and store the result in a variable (lancamentos_buscados, for example). Print the result.
- Take the output of the agente_buscador (the launches fetched from Google with the google_search tool) and pass them to the agente_planejador along with the topic. Store the return value in a variable (plano_de_post, for example). Print the result.
- Take the output of the agente_planejador (the generated post plan) and pass it to the agente_redator. Store the return value in a variable (post_redigido, for example). Print the final result, which is the post generated by your AI agent system!
print("🚀 Starting the Instagram Post Creation System with 3 Agents 🚀\n")

# --- Get the Topic from the User ---
topico = input("❓ Please type the TOPIC you want to create the trends post about: ")

# Insert the agent system logic
if not topico:
    print("\nYou forgot to type the topic!")
else:
    print(f"\nGreat! Let\'s create the post about what\'s new in {topico}")

    lancamentos_buscados = await agente_buscador(topico, data_de_hoje)
    print("\n--- 📝 Agent 1 Result (Searcher) ---\n")
    display(to_markdown(lancamentos_buscados))
    print("--------------------------------------------------------------")

    plano_de_post = await agente_planejador(topico, lancamentos_buscados)
    print("\n--- 📝 Agent 2 Result (Planner) ---\n")
    display(to_markdown(plano_de_post))
    print("--------------------------------------------------------------")

    post_redigido = await agente_redator(topico, plano_de_post)
    print("\n--- 📝 Agent 3 Result (Writer) ---\n")
    display(to_markdown(post_redigido))
    print("--------------------------------------------------------------")
Notice how one agent’s output becomes the next one’s input, creating a true “assembly line” of information processing. Since we’re using async functions (because of call_agent), we need to use await when calling them. In the Jupyter Notebook environment (and Colab), we can use await directly in the cells.
And that’s it! If everything went well, you should see the outputs of each agent, culminating in the final Instagram post generated by the Writer Agent. Awesome, right?
Once again, here’s the GitHub repository with the complete code!
Conclusion and Next Steps
In this tutorial, we took a nice dive into the Google Agent Development Kit (ADK) and built a pretty interesting multi-agent system. The coolest part is that this is just the tip of the iceberg! ADK is still under development, but it already offers a lot of flexibility.
What else can you explore from here?
- Experiment with different models: Try other models from the Gemini family for each agent and see how that affects the result. Bigger models can give more elaborate answers, but they can be slower or more expensive.
- Refine the instructions (prompts): The quality of the instruction is KEY. Try more detailed instructions, with examples (few-shot prompting), or with different “personas” for the agents.
- Add more agents: How about a reviewer agent? Or an agent that suggests images for the post?
- Explore other tools: ADK lets you create your own custom tools. Imagine an agent that can interact with a weather API to fetch weather information? Or a movie API? Or a Pokémon one? The limit is your creativity!
- Session persistence: For more robust applications, you might want to integrate with session services that persist the data in a database.
- User interface: How about building a simple interface with Streamlit or Gradio to interact with your agent system?
The world of AI agents is just getting started, and tools like Google ADK give us the power to build truly intelligent and useful applications. I hope this tutorial was a good starting point for you!
If you liked it, try it out, modify it and, of course, share the tutorial on your social media, and also whatever you build (you can tag me)!
See you next time and, as ET Bilu (a Brazilian meme alien) used to say: “Seek knowledge!” ;)